It’s hard to beat the Fujitsu ScanSnap iX500 scanner for any sort of situation where you want to go paperless. This is the ideal scanner for the job. It scans fast, it is super easy to use, and it just works. This scanner might cost more than others, but it is so easy to use and so efficient that it’s hard to put up with anything else if you can afford this one.
I’ll go into some details about what I do and don’t like about it shortly. First I would like to explain why I got this scanner.
Why Spend a Lot of Money on a Scanner?
I used to never really take scanners very seriously from a hardware standpoint. If I had an odd situation where I needed to scan something, my cheap, flatbed all-in-one scanner/printer worked just fine. Or so I told myself for many years. It didn’t matter to me because I only scanned a few documents a year, probably.
But then I went through an IRS audit. While going through the audit process, I thought to myself, “wow, I wish a had all this files in a digital format, this would be so much easier”. That was what was going through my mind while I dug up 3 years worth of statements, documents and receipts to submit to the time-wasters over at the IRS office.
At that point I started to seriously consider a paperless lifestyle. And by paperless, I mean anything document that needs to be saved, for both personal and business reasons, is scanned, shredded and forgotten about until I need it again. For me this was several file cabinets full of paperwork and several binders of statements and files, between both personal and business. That’s way too many documents for a single person to be hanging onto for those just-in-case scenarios. I won’t even get into the types of files I had, but it was just about anything you could imagine. And it was stuff I couldn’t just throw away either, I needed to keep a copy of it somehow if I was to get rid of it all.
I started to research scanners and found the Fujitsu ScanSnap pretty quickly. This is generally regarded as the go-to scanner in many discussions online. There really doesn’t seem to be much for competition, at least in the sub-$500 price range. The only other scanners that were being mentioned as comparable by reviewers were older models of a similar scanner by Fujitsu.
So, I guess what I’m saying is, when I did the research this scanner jumped out and stayed ahead of the competition pretty much right away.
So I bought it, from Amazon, with free shipping via Prime. It was a pretty good price. But I was going to have to wait two days to get it. The day after I ordered it I had one of those moments where I thought, “did I just really spend more than $400 on a scanner”?
And two days later it showed up.
Evernote Edition? No Thanks.
There was also a specific Evernote edition of this scanner. I use Evernote heavily and was very interested in the Evernote edition, but after doing some more research I found that I really wanted the standard ScanSnap instead. I didn’t find very good feedback with the Evernote edition and wasn’t confident it was going to provide a better experience than the standard ScanSnap.
Supposedly with the Evernote edition, you can put a whole pile of docs into the scanner and it will scan and sort them all for you into Evernote. This sounds great, but there was a lot of feedback online from frustrated users who said the Evernote edition was pretty bad about splitting up multi-page docs into multiple single page files among other things. I won’t get into the details here, but after careful consideration I knew I needed to go with the standard ScanSnap even though my end goal was to put everything I scanned into Evernote.
First Impressions
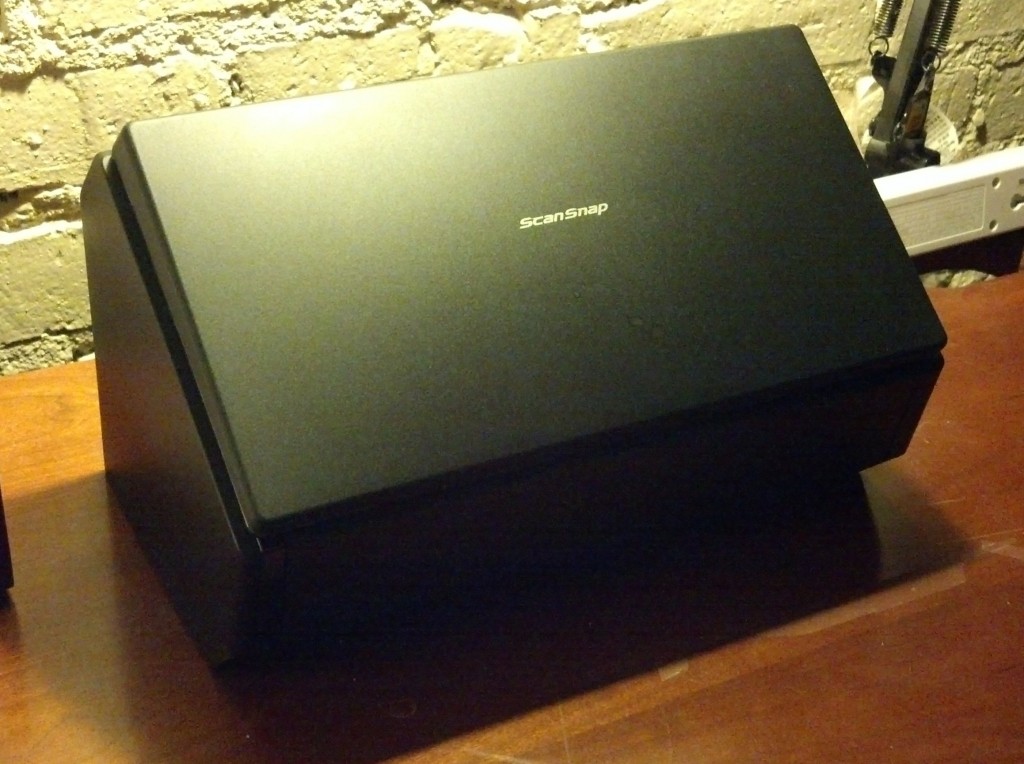
When the ScanSnap was first delivered, I was surprised at how small the box was. It was pretty compact.
When I unboxed the scanner, I was further surprised to find that it was a fairly small, stylish-looking unit. It fold up nicely and has a small footprint. When the unit is folded up, I can fit it into my backpack or a small duffel really easily for transporting. Not that I would travel with it much, but carrying it between home and the office is really easy due to its size.
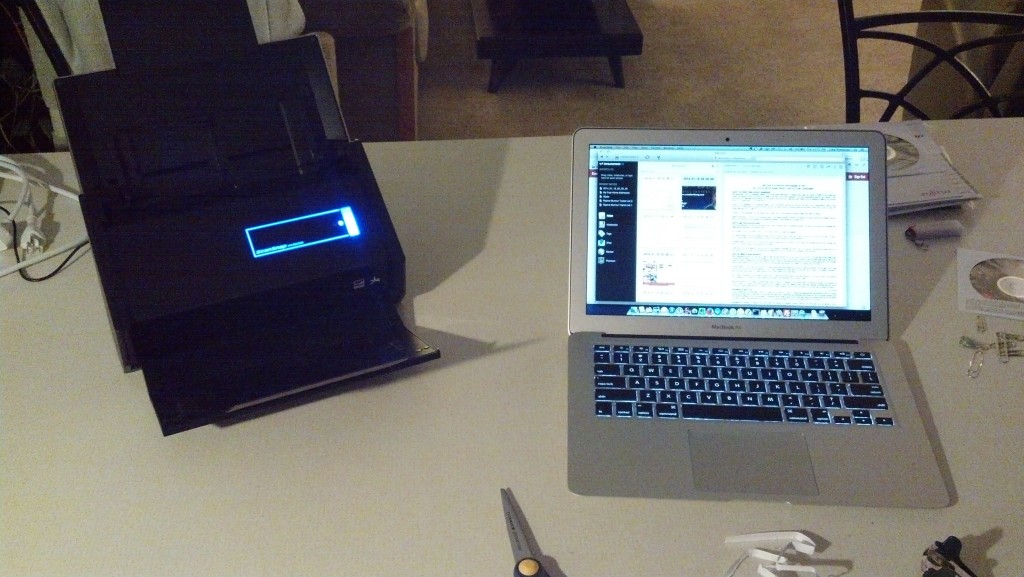
The setup instructions were fairly simple, and I was scanning via the USB cable within minutes to my Macbook. With just a few more minutes, I was able to go through the wireless setup. In less than a half hour I had unpacked the scanner for the first time and was scanning via wireless network to my laptop.
The scans were easy to perform, and there was lots of options for scanning different types of documents and images, and I was putting this device to good use very quickly.
Setup
Setup of the ScanSnap is easy. Take it out of the box, plug in the power cable, install the software from the DVD (or online) and plug in the USB cable to your computer. If you want to use it via wireless network (which I recommend) there is a Wifi setup app that is installed to your machine to handle that portion. The Wifi setup app takes you through basic configuration with your wireless network and is pretty easy to do, just make sure you have your wireless network login info handy.
Ease of Use
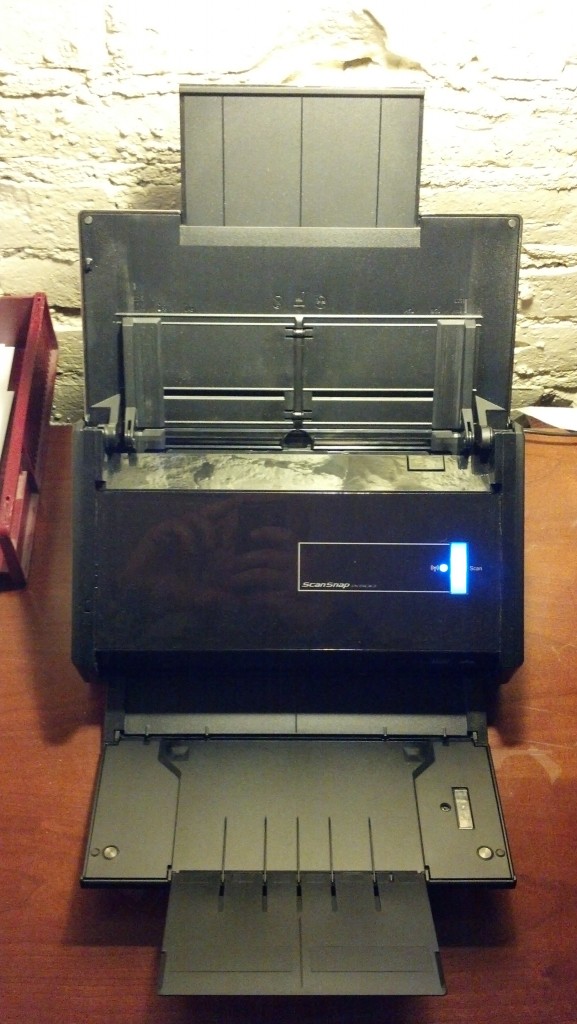
After the device is configured with your computer, scanning is easy. You can simply put a document in the paper feed, hit the scan button on the scanner, and it scans. Simple as that.
By default, the ScanSnap Manager opens up each time you scan so that you can choose how and where to scan the document.
You can continue to use this selection screen each time you scan, or you can create your own profiles and manually select a profile before scanning – which is what I like to do.

Either option is pretty flexible and efficient, and I really appreciate that you can create and save your own profiles for commons types of scanning actions. Once you get your scanning profiles set up the way you like, scanning is as easy as selecting a profile on the computer (or if you use the same profile all the time you don’t even need to do that) and hit the scan button on the scanner. The rest is automated.
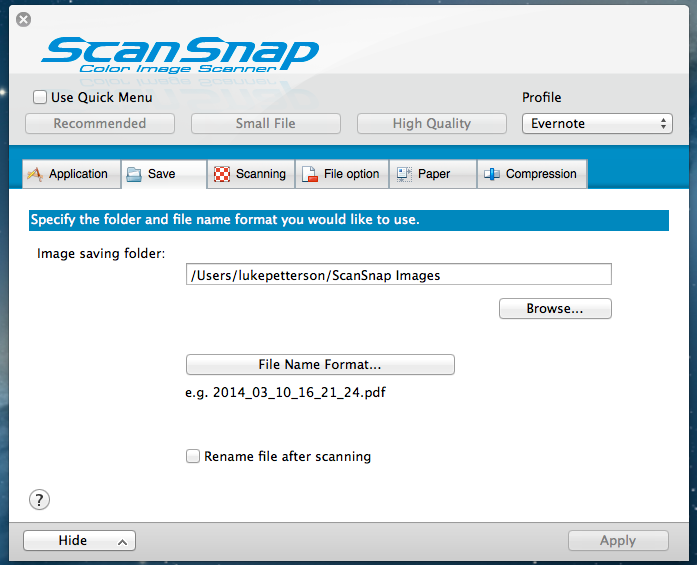
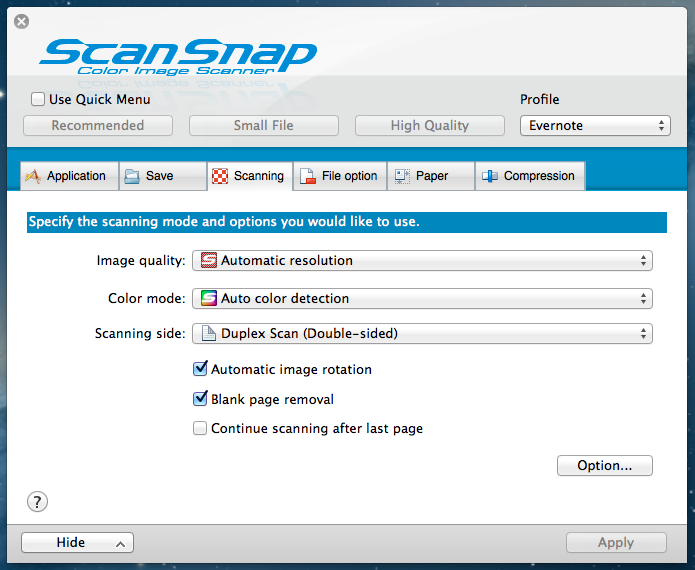
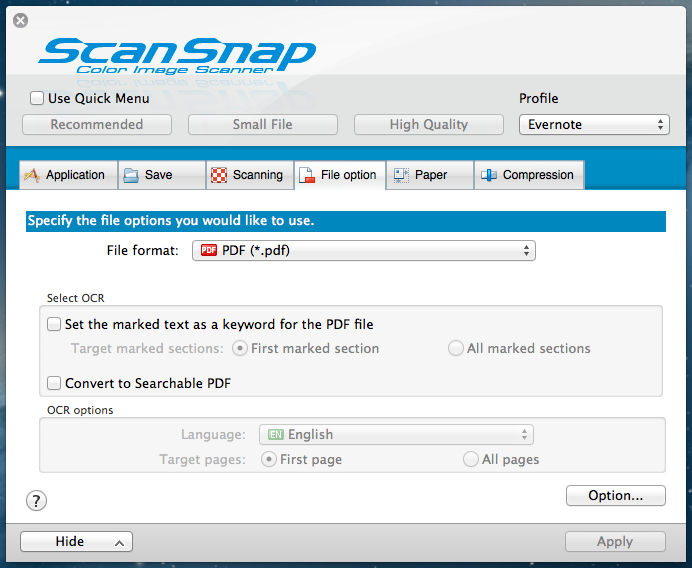
Scanning Profiles
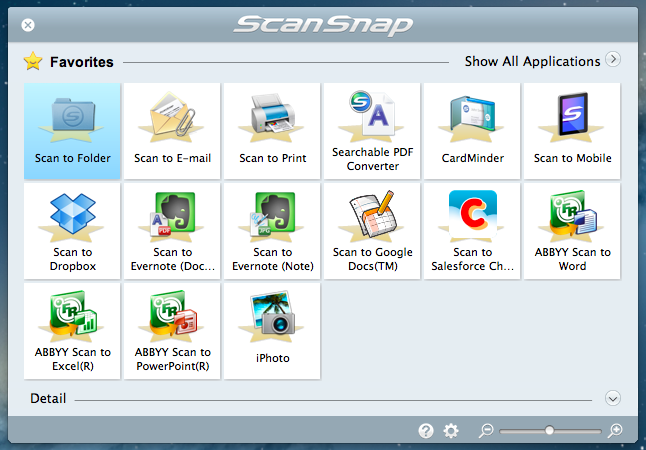
After installation, you will have the ScanSnap Manager software on your computer. This software opens up and lets you select a profile for scanning each The ScanSnap Manager is software that lets you create profiles for scanning. You can create and toggle between different profiles for different types of scanning. For example, you can create a profile that will scan black and white PDF documents straight to Evernote. Or you can create a profile that will scan photographs, in color and at a high resolution, and save them to a folder on your hard drive.
Here are some screenshots of the options you can use when setting up scanning profiles:
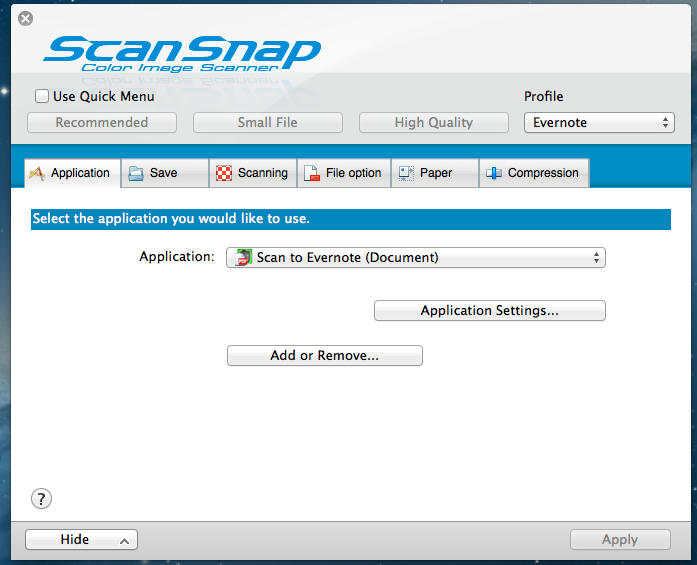
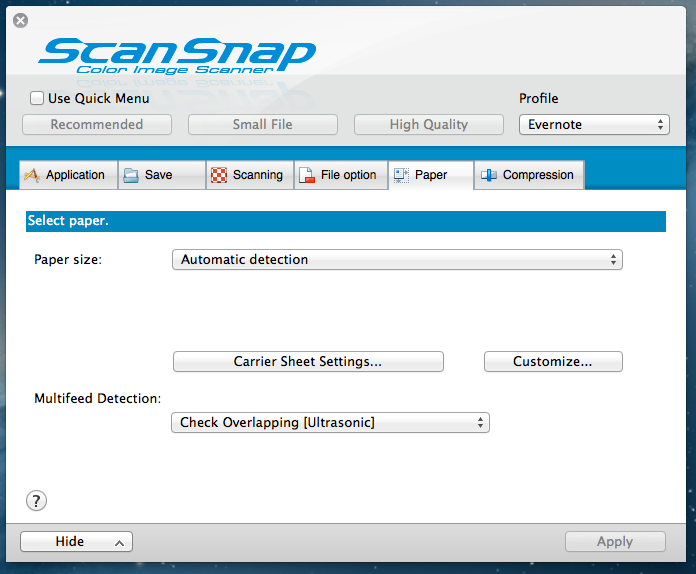
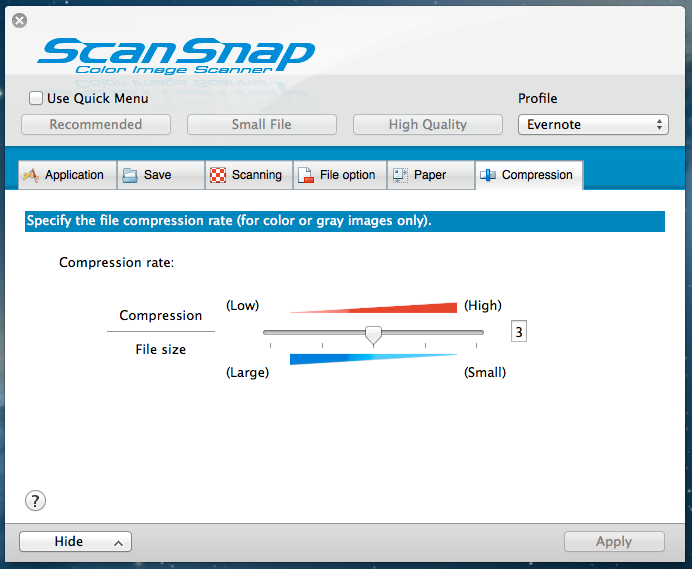
A quick example of what makes a profile would be something like this: Scan to Evernote, Black & White, One Sided, 300 dpi as a PDF.
You can create as many profiles as you like.
Myself, I’ve set up the following profiles, which work well when bulk scanning documents:
- Evernote – This is my standard profile, which will scan a document of any number of pages, automatically select color or black and white, and save the whole document as a PDF to Evernote.
- Evernote Single Pages – This is the profile I use where I have a stack of single-page documents and want to scan the whole stack, but make a separate PDF for each page in the stack. This works great for bulk scanning a pile of single-page documents. (Note: I’ve also setup profiles called Evernote Two Pages and Evernote Three Pages which I use to bulk scan docs of two or three pages in length)
- Evernote Single Pages (Front) – This is the profile I use to bulk scan a pile of documents that I want to be saved as individual PDFs, but in this case the scanner only scans the front side of the documents instead of both the front/back.
- Photos – This profile is one that I set up to scan photos at the highest resolution possible and save them to specified folder on my hard drive.
I had to play with the various profile settings a bit to figure out how to use the profiles most effectively, and I could imagine each person will have their own preferences in how they use profiles. But this is where the power of the ScanSnap lies, so it’s worth it to take the time to fully understand using the profiles as it will make scanning much more efficient if you plan to do a lot of scanning with this device.
Scanning Quality
I have had no issues with the quality of the scans I’ve done with this machine. Using the settings, you can choose a balance between quality, speed and file size. For documents, I typically use black and white as a PDF, which creates very efficient files sizes. I’ve also scanned photos at the highest resolutions and settings and was very impressed with the results, noticing no artifacts in the photos when using no compressions and the highest DPI settings.
Overall, I have no complaints about scanning quality, and I’ve been continually impressed by the quality of scans versus the resulting file sizes.
Searchable PDF Files
The best thing about this scanner is that every document that I scan is stored as a PDF file that can be keyword searched. The advantage of this is that I can do a simple search in Evernote for something as simple as a dollar amount, for example, like $432.65, and find the receipt that has that number on it very quickly.
It used to take me quite a while to search through documents or receipts to find anything specific, but now I’ve reduced all of that down to simple keyword searches in Evernote. The first time you need to find a document from several years ago, and find it in a matter of seconds via searching this way, you will be a very happy person.
Worth the Money?
Absolutely. I never thought I’d spend $400+ on a scanner, but I did. I figured if I didn’t find it to be valuable I could just resell it. But I can’t live without it now. I’ve rid myself of mountains of paper, and have the ease of mind of having all those documents easily available in a searchable, digital library. It’s a great feeling, especially as somebody who both runs multiple businesses and manages all the files and finances for my family.
If you go into any of my offices now, it looks like I’m not doing anything because there is no paper laying around. But I like it that way. Even if you are on the fence about this scanner, give it a shot. These are easy to resell in the case that you don’t find it worth the money, the market it very hot for this scanner.
Where to Buy?
I bought mine from Amazon.com, and I feel I got a very good deal on the price. I haven’t seen any place where it’s cheaper, but there might be some places out there that have a lower price if you search a bit. It’s hard to beat the free shipping though if you have Amazon Prime, as I do.

